
If you are ready to fall in love with a cookie that combines the rich intensity of chocolate with an irresistible molten center, these Chocolate Lava Cookies are exactly what you need. Imagine biting into a crisp, crackly edge that gently gives way to a gooey, flowing core of melted chocolate — pure magic in every bite. These cookies bring together simple ingredients in a way that feels indulgent yet approachable, turning an everyday treat into a show-stopping dessert. Whether you need a comforting snack or a decadent finale to dinner, Chocolate Lava Cookies promise to deliver a sensational experience that will have everyone asking for seconds.
Ingredients You’ll Need
Gathering the ingredients for these cookies is delightfully straightforward. Each one plays an important role, creating the perfect balance of texture, flavor, and that signature molten center you’ll adore.
- All-purpose flour: Provides the structure that holds these cookies together without weighing them down.
- Unsweetened cocoa powder: Adds deep chocolate flavor with a slightly bitter edge to balance the sweetness.
- Baking powder: Gives a gentle lift to keep the cookies tender, not cakey.
- Salt: Enhances all the chocolate flavors and rounds out the sweetness.
- Semi-sweet chocolate (6 oz chopped): Melted into the dough for a rich, fudgy essence throughout.
- Semi-sweet chocolate chunks (4 oz cut into 12 pieces): The molten centerpiece that melts gloriously inside each cookie.
- Unsalted butter: Adds creaminess and helps create those slightly crisp edges.
- Granulated sugar: Brings light sweetness and helps with the perfect cookie texture.
- Brown sugar: Adds moisture and a subtle caramel note for complexity.
- Large eggs: Bind all ingredients and contribute to the chewy, soft texture.
- Vanilla extract: Rounds out the flavor just enough to highlight the chocolate without overpowering it.
How to Make Chocolate Lava Cookies
Step 1: Mix the Dry Ingredients
Start by whisking together the flour, cocoa powder, baking powder, and salt in a medium bowl. This foundational blend ensures every bite has a consistent chocolate flavor and the right rise, setting you up for success as you build the dough.
Step 2: Melt Chocolate and Butter
Next, melt the 6 ounces of chopped semi-sweet chocolate along with the butter in a microwave-safe bowl, heating in 30-second bursts and stirring in between. Once velvety smooth, let this mixture cool slightly before incorporating. This step infuses the dough with fudgy richness and helps achieve the iconic molten center.
Step 3: Combine Sugars, Eggs, and Vanilla
In a large bowl, whisk together both sugars, the eggs, and vanilla extract until the mixture is smooth and glossy. This creates the base that binds moisture and flavor harmoniously with the chocolate.
Step 4: Bring It All Together
Stir the melted chocolate mixture into the sugar and egg blend until fully combined. Then, gently fold in the dry ingredient mixture just until incorporated. The dough will be thick and slightly sticky — exactly what you want for a soft and gooey cookie.
Step 5: Chill the Dough
Cover your dough and refrigerate it for at least 30 minutes. This cooling step firms up the dough, making it easier to shape, and helps the cookies retain their shape and consistency while baking.
Step 6: Shape with Chocolate Centers
Preheat the oven to 350°F (175°C) and line your baking sheets with parchment paper. Divide the chilled dough into 12 equal portions. Flatten each portion and place one chocolate chunk in the center, then carefully fold the dough around the piece, sealing it inside completely to create the molten core.
Step 7: Bake to Perfection
Arrange the cookie balls about 2 inches apart on your baking sheets. Bake for 10 to 12 minutes, watching for set edges with still-soft centers and that crackly top — this is your cue that the cookies are ready to deliver that lava-like experience.
Step 8: Cool and Serve Warm
Let the cookies cool on the baking sheets for 5 minutes to set slightly, then transfer to a wire rack. Serve them warm to enjoy the gooey, molten chocolate center at its most decadent. Trust me, this is the best way to savor your Chocolate Lava Cookies.
How to Serve Chocolate Lava Cookies
Garnishes
A sprinkle of powdered sugar on top adds a delicate sweetness and a beautiful contrast against the dark chocolate. For a fresh twist, a few fresh raspberries or a light dusting of cocoa powder can elevate the look and flavor instantly.
Side Dishes
Pair these cookies with a scoop of vanilla ice cream or a dollop of freshly whipped cream. The cool creaminess cuts through the rich chocolate and enhances that molten sensation, creating an irresistible combo that satisfies every craving.
Creative Ways to Present
Impress guests by serving your Chocolate Lava Cookies on elegant dessert plates with drizzles of raspberry coulis, caramel sauce, or a sprinkle of toasted nuts. You can even serve them inside cute ramekins to keep the warmth and ooze centered for an extra-special touch.
Make Ahead and Storage
Storing Leftovers
If any cookies survive the first round (which is rare), store them in an airtight container at room temperature for up to two days. They’ll stay soft but keep in mind, the molten centers will firm up as they cool.
Freezing
For longer storage, freeze the shaped cookie dough balls before baking. Wrap them tightly and freeze for up to 1 month. When ready to bake, thaw in the refrigerator overnight and proceed with baking as directed for fresh-out-of-the-oven decadence any time.
Reheating
To revive the warm, melted center in leftover cookies, simply microwave for 10 to 15 seconds. This quick zap reignites the molten core and restores that amazing gooey texture that defines these delightful cookies.
FAQs
Can I use dark chocolate instead of semi-sweet?
Absolutely! Dark chocolate will give your Chocolate Lava Cookies a richer, slightly more bitter flavor that pairs beautifully with the sweetness of the dough. Just make sure to use a quality chocolate for the best results.
Why do my cookies not have a molten center?
The key is not to overbake. Bake until the edges are set, but the center looks soft and slightly undercooked. Also, sealing the chocolate chunk fully inside the dough helps keep it molten during baking.
Can I make the dough without chilling?
While you can bake immediately, chilling the dough for at least 30 minutes improves texture and makes shaping easier. It also helps prevent cookies from spreading too much in the oven.
Is there a gluten-free option?
You can experiment with gluten-free flour blends designed for baking, but results may vary. For a reliable molten center, stick to all-purpose flour or test the alternative flour ahead of time.
How do I get the crackly tops on the cookies?
The crackly tops come from the combination of sugar and cocoa powder in the dough and precise baking time. Don’t overmix and bake just until edges set to achieve that signature texture and look.
Final Thoughts
Making Chocolate Lava Cookies at home is like unlocking a treasure of chocolate goodness that melts right in your mouth. These cookies are an absolute crowd-pleaser and a surefire way to bring smiles and sweet moments to any occasion. So roll up your sleeves, dive in, and get ready to watch the molten magic unfold — you won’t regret it!
Print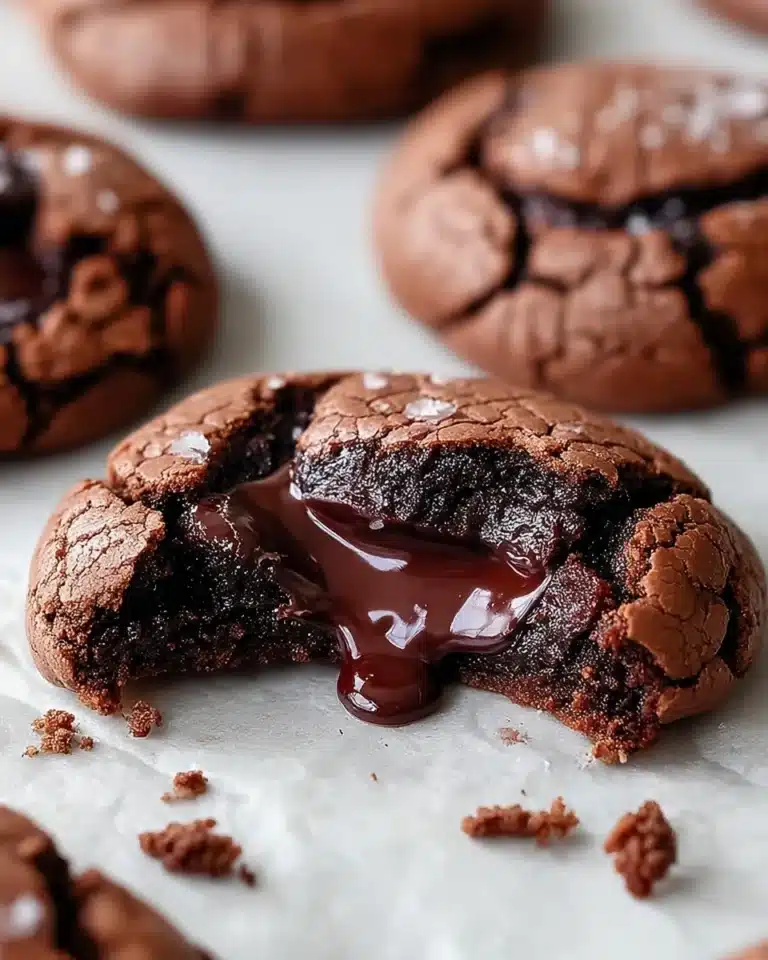
Chocolate Lava Cookies Recipe
Indulge in these decadent Chocolate Lava Cookies featuring a rich, molten chocolate center encased in a soft, fudgy cookie exterior. Perfectly crackly on the outside and irresistibly gooey inside, these cookies are a chocolate lover’s dream and ideal for any special occasion or cozy treat.
- Total Time: 47 minutes
- Yield: 12 cookies
Ingredients
Dry Ingredients
- 1 cup all-purpose flour
- 1/2 cup unsweetened cocoa powder
- 1 teaspoon baking powder
- 1/2 teaspoon salt
Chocolate
- 6 oz semi-sweet chocolate, chopped
- 4 oz semi-sweet chocolate, cut into 12 chunks
Wet Ingredients
- 1/2 cup unsalted butter
- 3/4 cup granulated sugar
- 1/2 cup packed brown sugar
- 2 large eggs
- 1 teaspoon vanilla extract
Instructions
- Mix dry ingredients: In a medium bowl, whisk together the flour, cocoa powder, baking powder, and salt. Set aside.
- Melt chocolate and butter: In a microwave-safe bowl, combine the 6 oz chopped chocolate and butter. Microwave in 30-second intervals, stirring between each, until fully melted and smooth. Allow to cool slightly.
- Combine sugars, eggs, and vanilla: In a large bowl, whisk together the granulated sugar, brown sugar, eggs, and vanilla extract until well combined. Add the melted chocolate mixture and stir until smooth.
- Fold in dry ingredients: Gradually fold the dry ingredients into the wet ingredients until just combined. Do not overmix. The dough will be thick and somewhat sticky.
- Chill the dough: Cover the dough and refrigerate for at least 30 minutes to firm up.
- Prepare cookie balls: Preheat oven to 350°F (175°C) and line baking sheets with parchment paper. Divide the dough into 12 equal portions. Flatten each portion, place a chocolate chunk in the center, and fold the dough around it, sealing completely.
- Bake: Place the cookie balls on the prepared baking sheets, spacing them about 2 inches apart. Bake for 10-12 minutes until the edges are set but the centers are still soft. The tops should be crackly.
- Cool and serve: Allow cookies to cool on the baking sheet for 5 minutes before transferring to a wire rack. Serve warm to enjoy the molten center.
Notes
- For the best lava effect, don’t overbake these cookies. The edges should be set but the center should still be soft.
- If you want to prepare ahead, you can refrigerate the dough balls for up to 24 hours before baking.
- These cookies are best enjoyed warm when the center is still molten. If they cool completely, you can warm them in the microwave for 10-15 seconds.
- For an extra-special presentation, dust with powdered sugar just before serving.
- High-quality chocolate makes a big difference in this recipe – use the best you can find.
- Prep Time: 15 minutes
- Cook Time: 12 minutes
- Category: Dessert
- Method: Baking
- Cuisine: American
- Diet: Vegetarian
Nutrition
- Serving Size: 1 cookie
- Calories: 220 kcal
- Sugar: 20 g
- Sodium: 95 mg
- Fat: 12 g
- Saturated Fat: 7 g
- Unsaturated Fat: 4 g
- Trans Fat: 0 g
- Carbohydrates: 26 g
- Fiber: 3 g
- Protein: 3 g
- Cholesterol: 55 mg


